

Last week, you learned how to use CSS to arrange widgets vertically and horizontally in Textual. This week, you will learn another way to layout widgets using some of Textual’s built-in containers.
Layouts with Containers
The Textual package has several utility containers you can use to lay out your widgets. You are most likely to use Vertical, Horizontal, or Grid containers. You can also combine the containers to create more complex layouts.
Here is a full list of the containers included with Textual at the time of writing:
Center
Container
Horizontal
HorizontalScroll
Middle
ScrollableContainer
Vertical
VerticalScroll
You will most likely use the Center, Middle, Horizontal, and Vertical containers the most.
Practice is the best way to learn, especially when laying out user interfaces. You can start your container journey by opening your Python editor and creating a new file called horizontal_container.py. Then enter the following code:
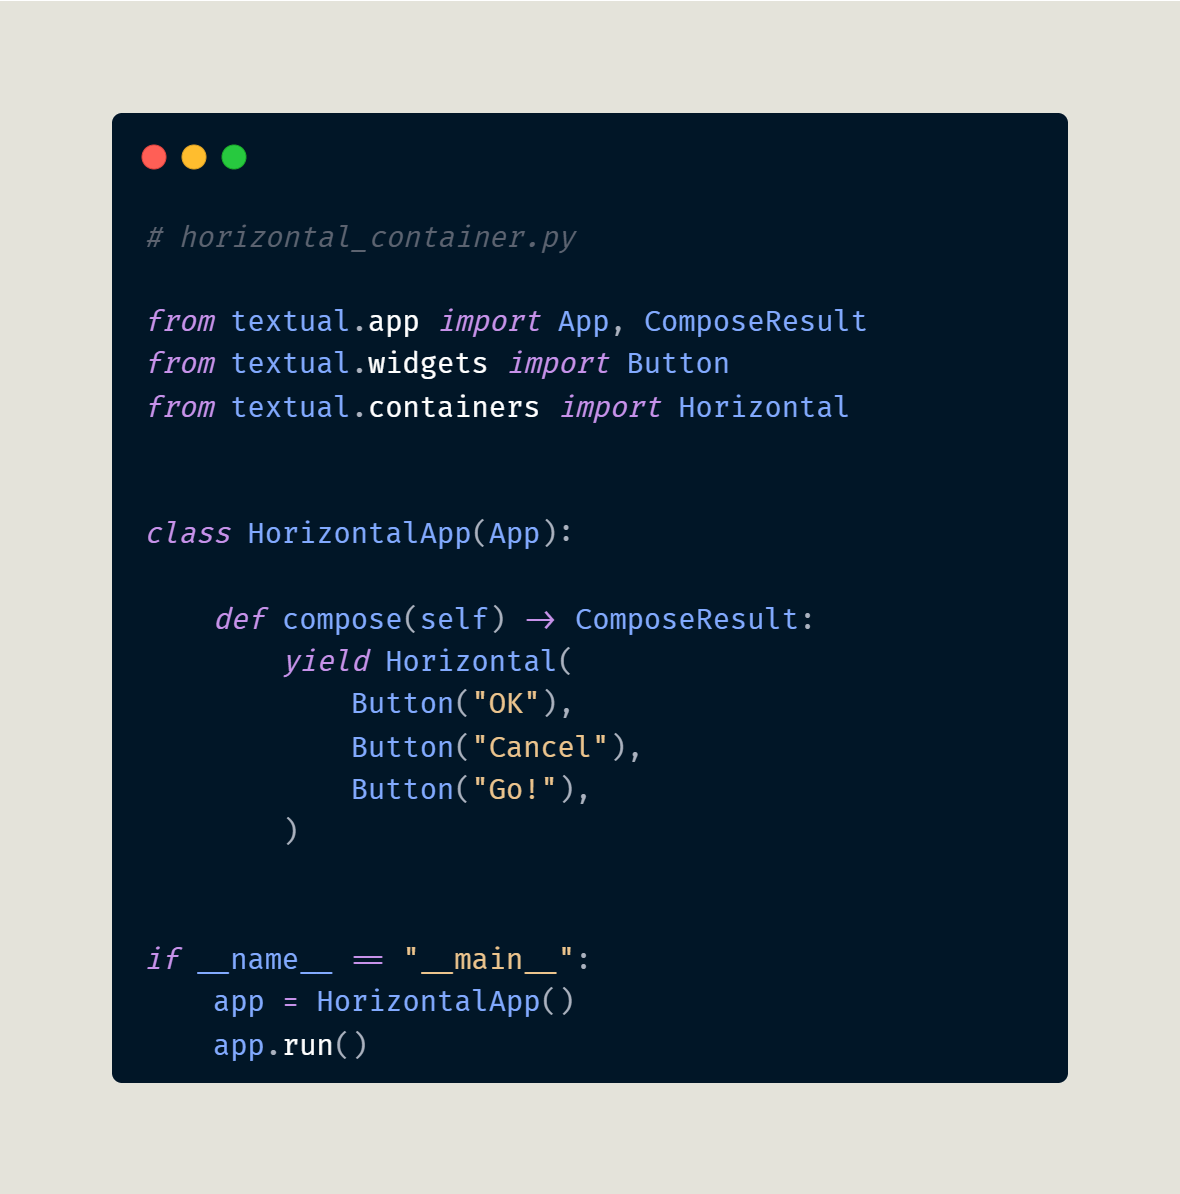
You import the Horizontal container from textual.containers. The main contents of a container are its widgets. You reuse the widgets from the previous example here. Pay attention and note that you do not need to use yield inside the container. You can simply add the widget instances instead.
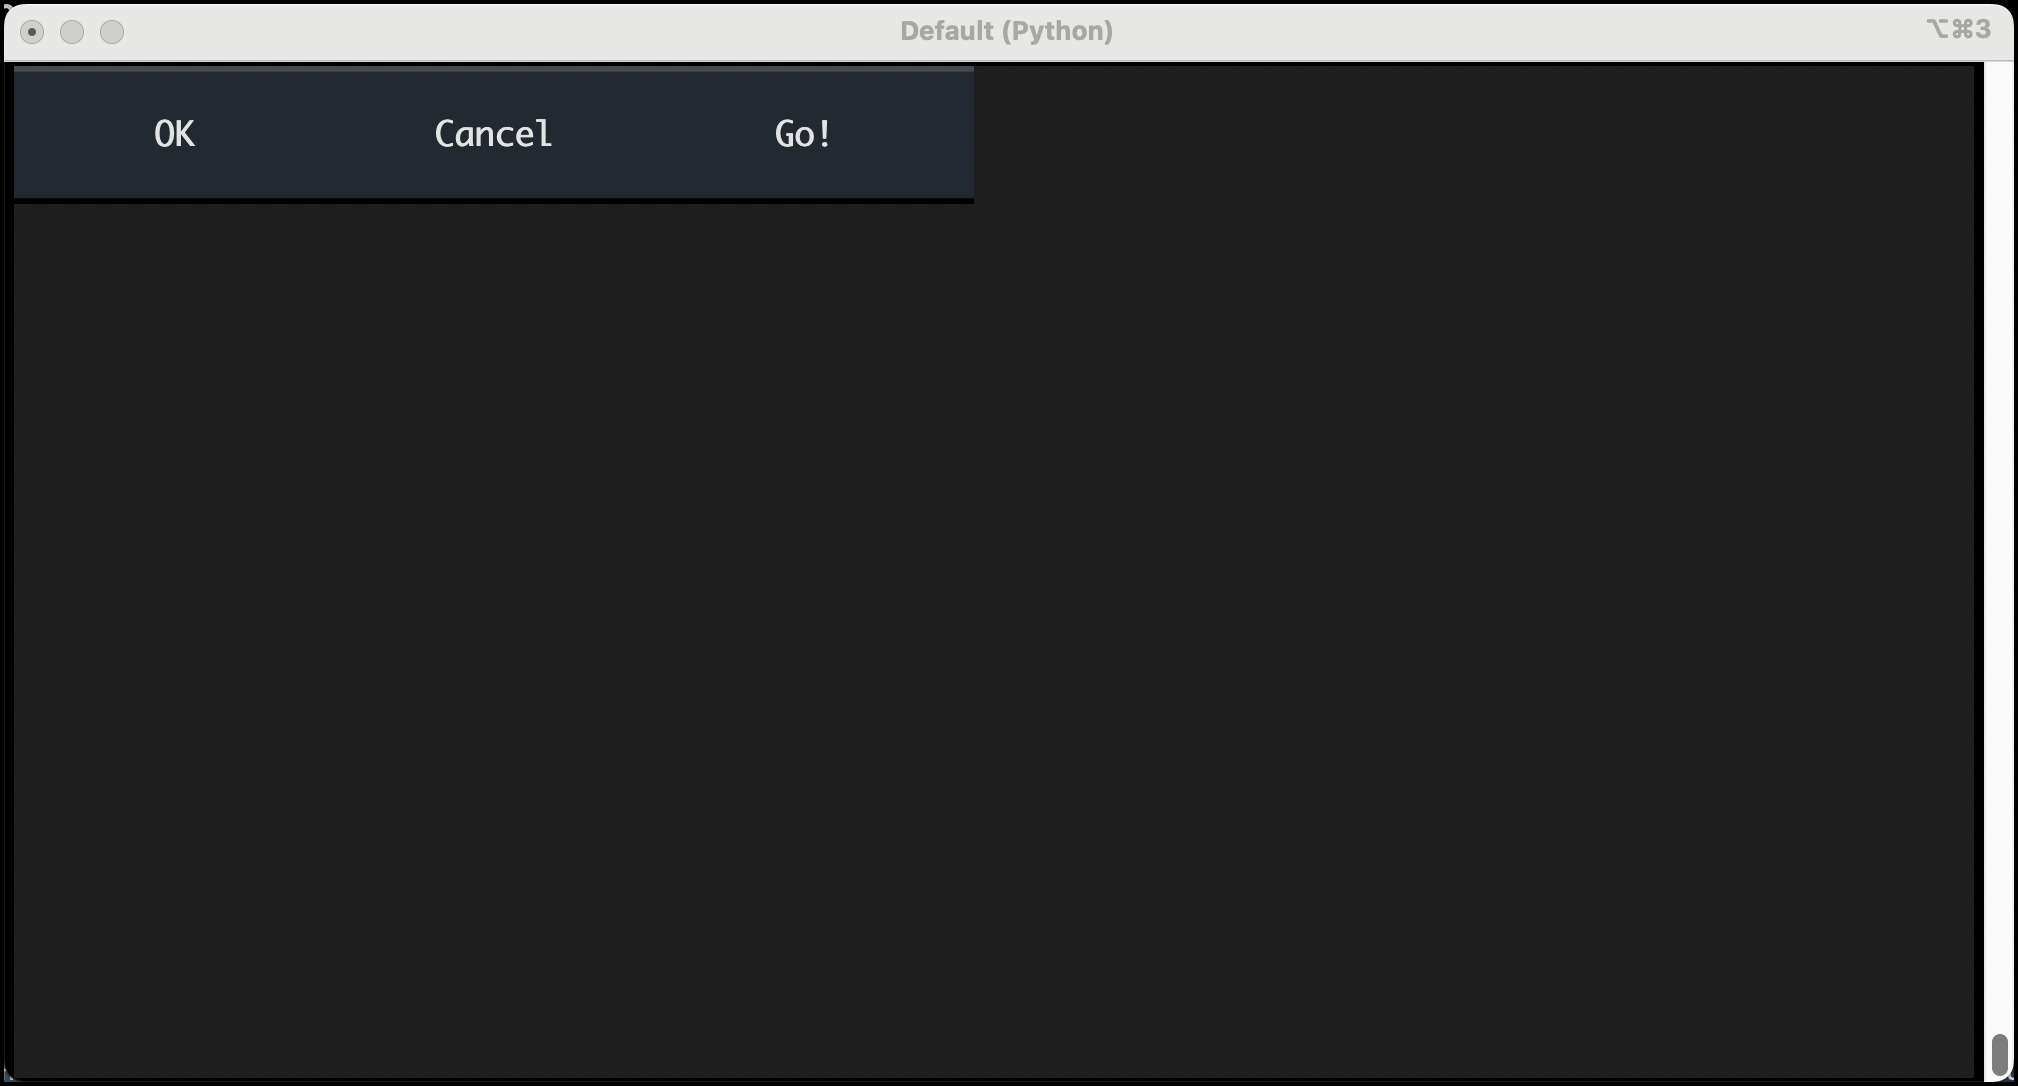
When you run this code, you will see something like this:
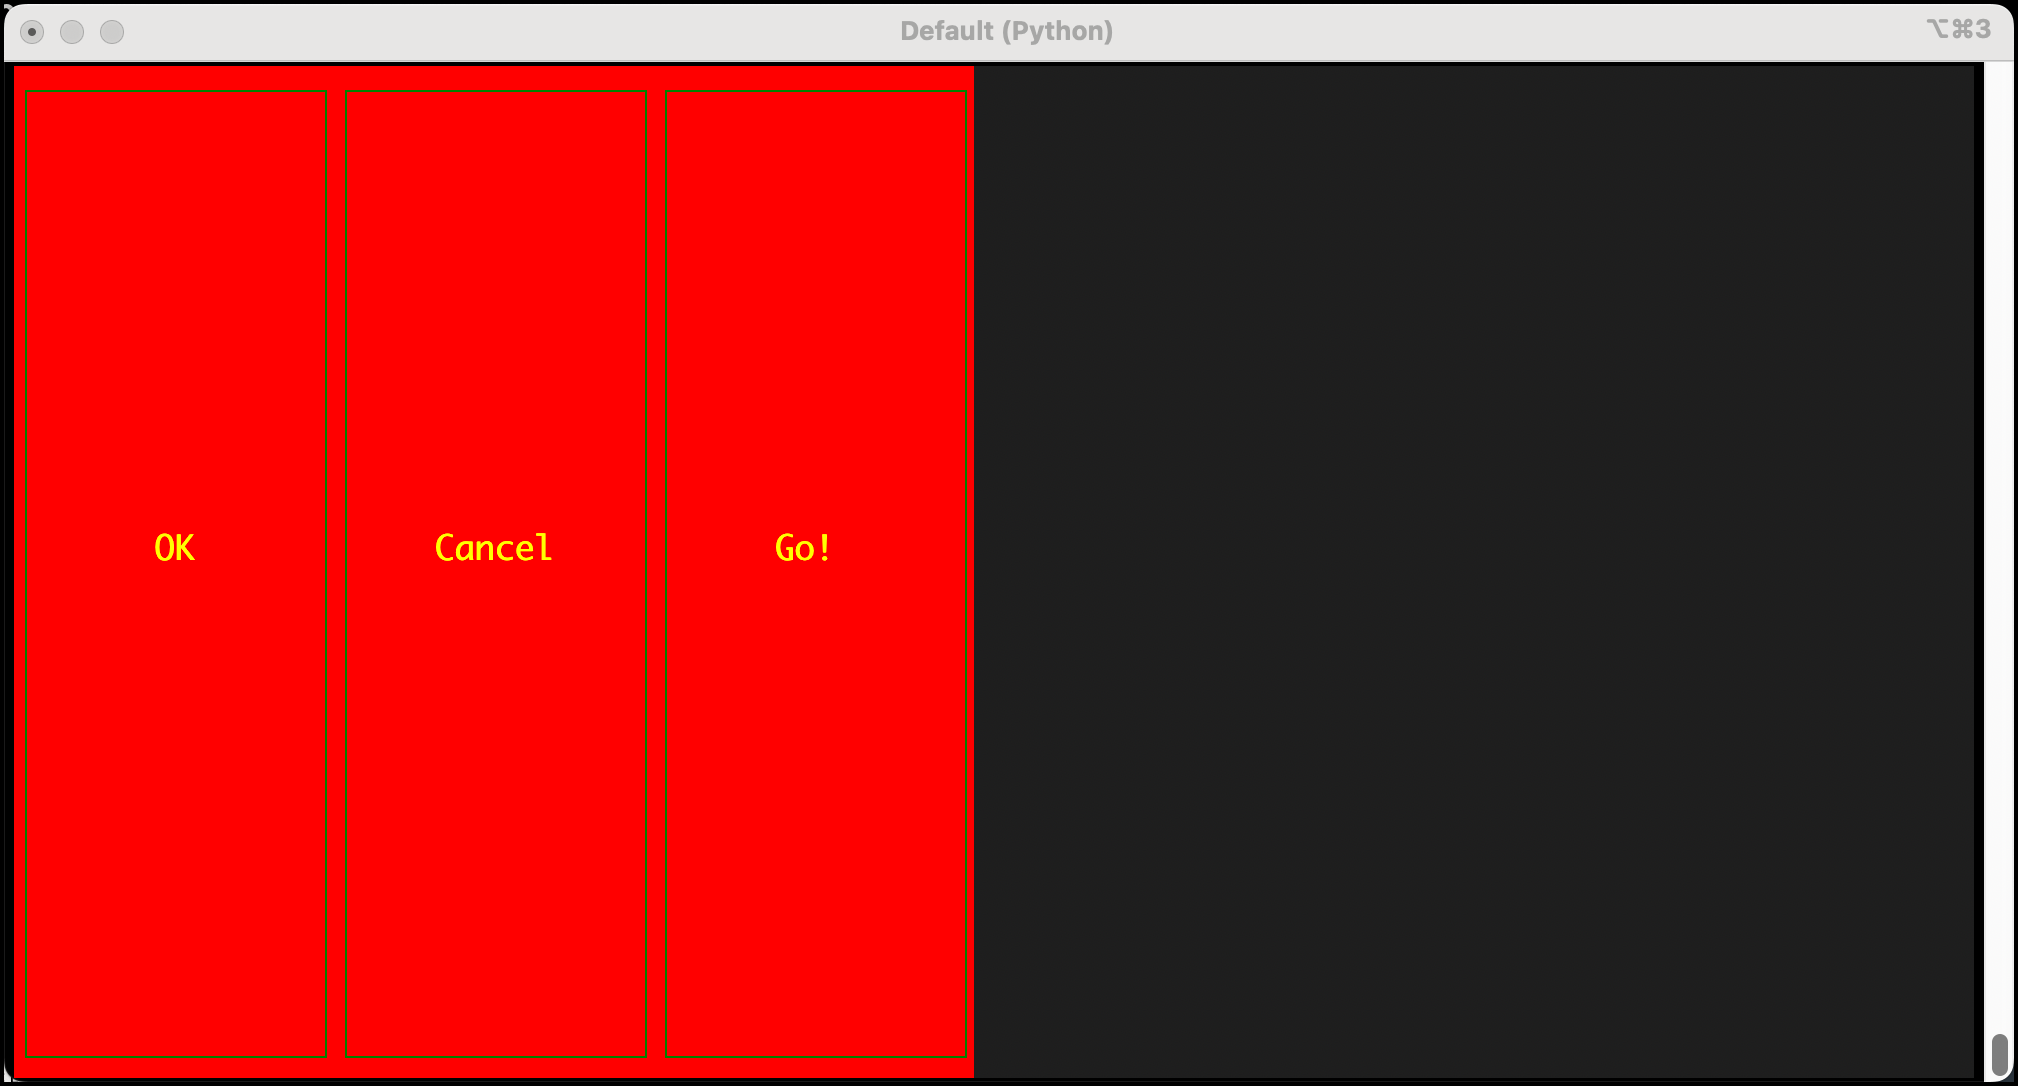
What will happen if you use your horizontal.tcss file with this code? Try adding it to the code above and re-run your example.
The result will look familiar:
The real benefit of using containers comes when you nest them. You’ll find out about that concept next!
Nesting Containers
Nesting containers lets you combine horizontally and vertically oriented widgets, creating rows and columns of widgets. This design pattern can create some pretty nice layouts.
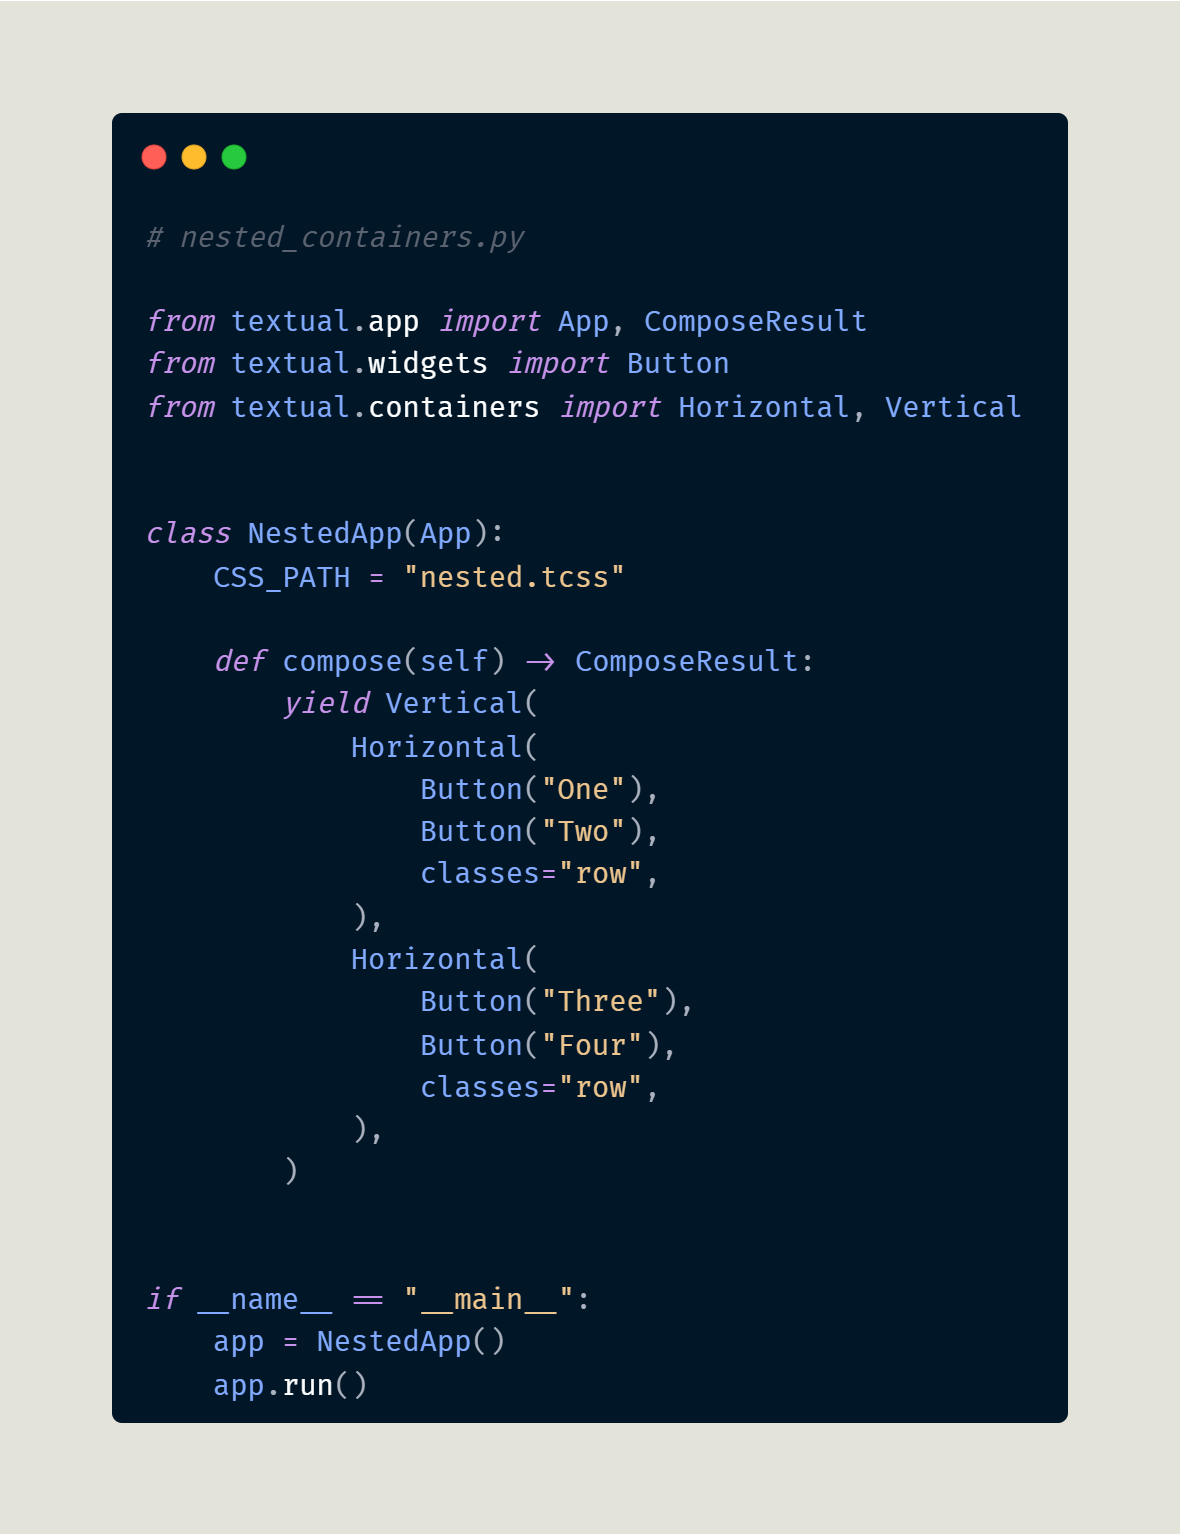
To start, create a new file called nested.py in your Python editor. Then add this code to it:
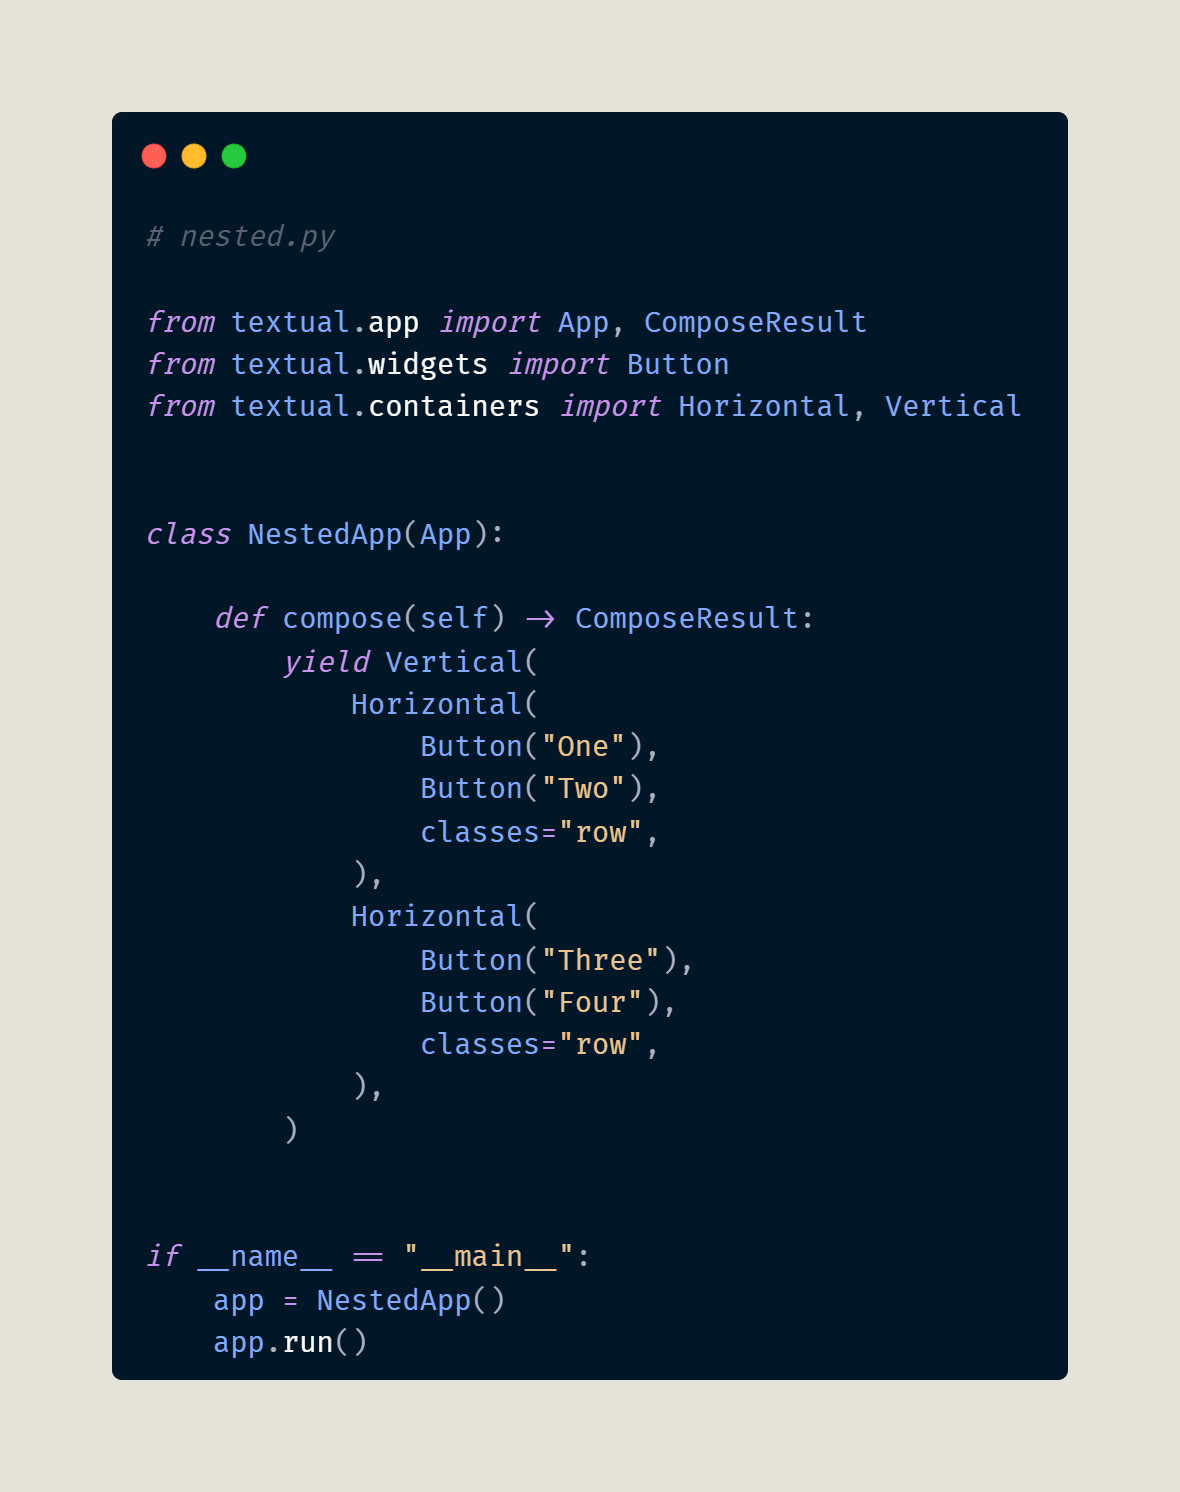
Your code above has a single Vertical container with two Horizontal containers inside. You can think of the Horizontal containers as “rows”. You can see that you set the classes parameters to “row” to identify them. Each row contains two Button widgets.
When you run this code, you will see something like this:
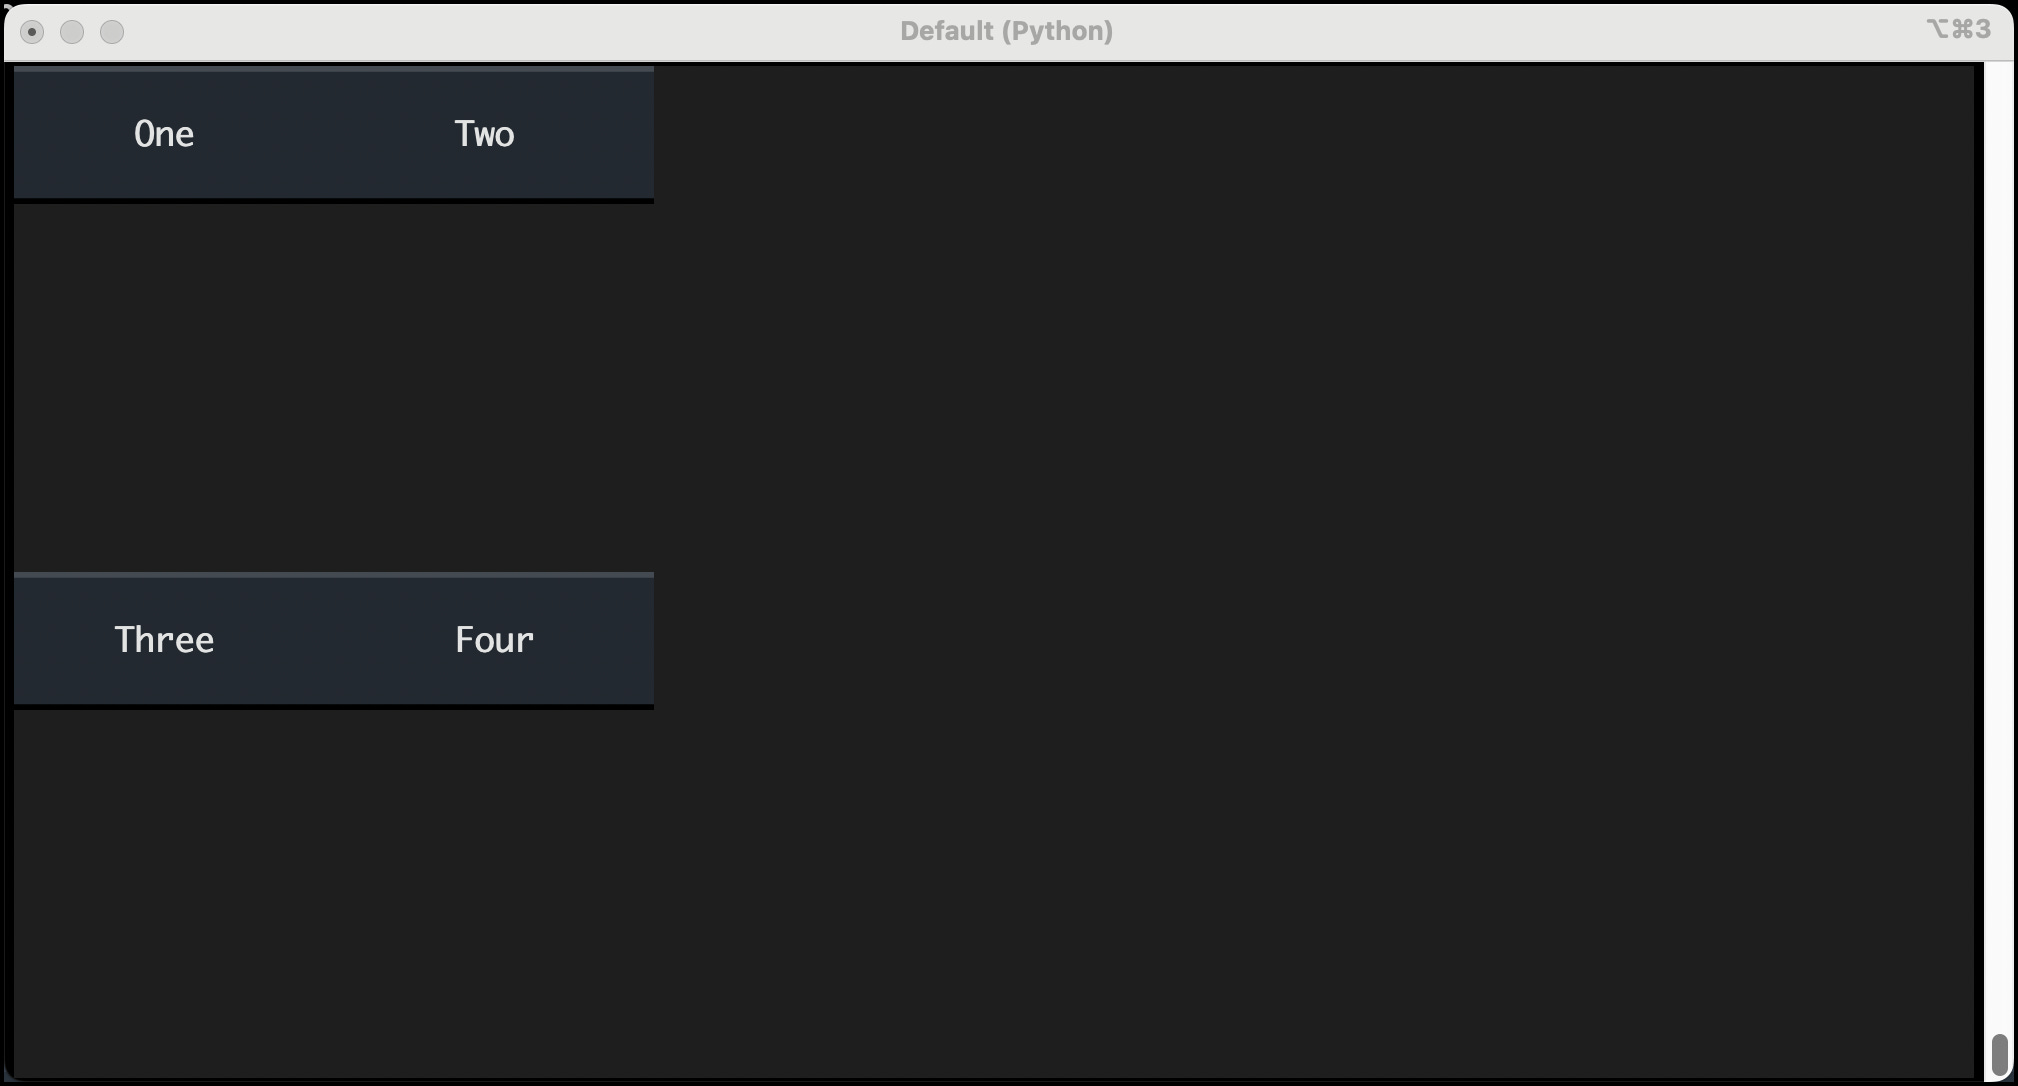
This example doesn't use any CSS. You should do that! Update the code to include a CSS file called nested.tcss, like the code below:
Then, create the nested.tcss file. You will be putting the following CSS rules into it:
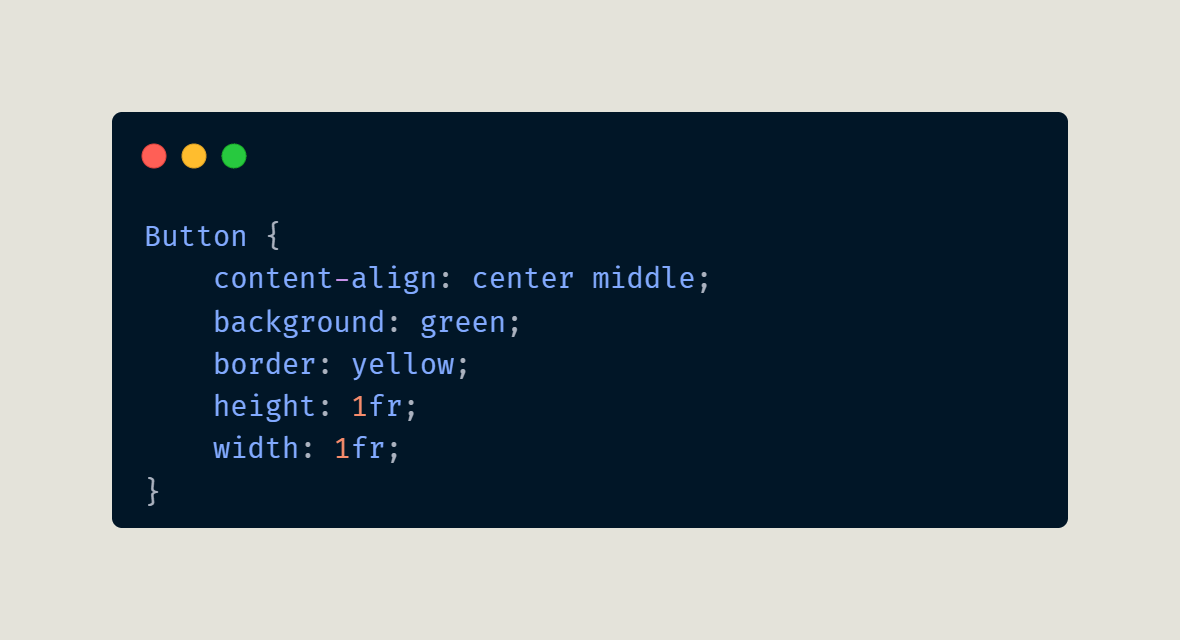
Here, you set various rules for the Button widgets to follow. You want the buttons to be green with a yellow border. You also set the width and height to 1fr, which causes the buttons to expand to fit all the horizontal and vertical space.
When you run this version of your code, you can see that the user interface has changed significantly:
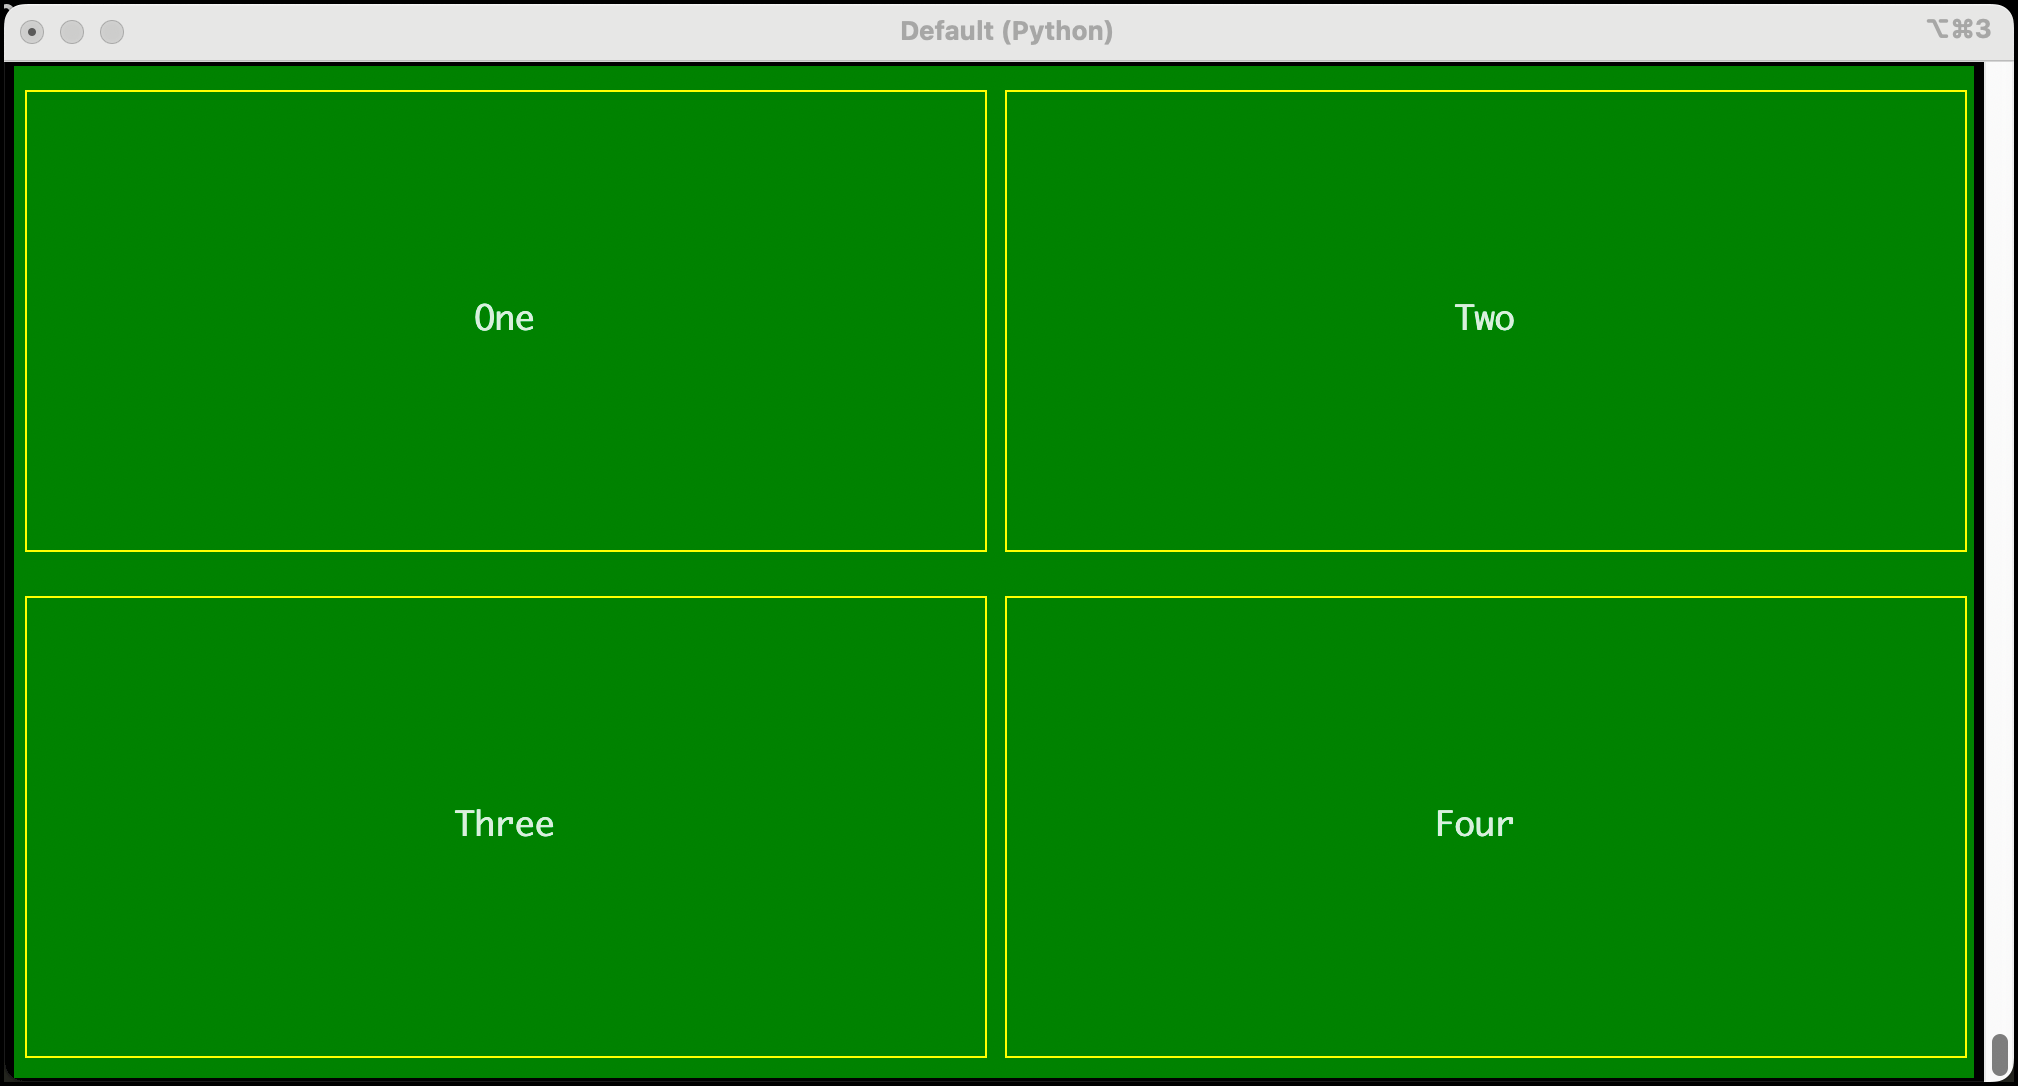
Nice! Spend some time adjusting the style rules and seeing how to change these layouts.
Using Context Managers
You can use Textual containers as context managers. What does using a widget as a context manager mean, though? That means you can use Python’s with statement with the container.
You’ll understand it better by writing some code. Open up your Python editor and create a file called context_containers.py with the following code in it:
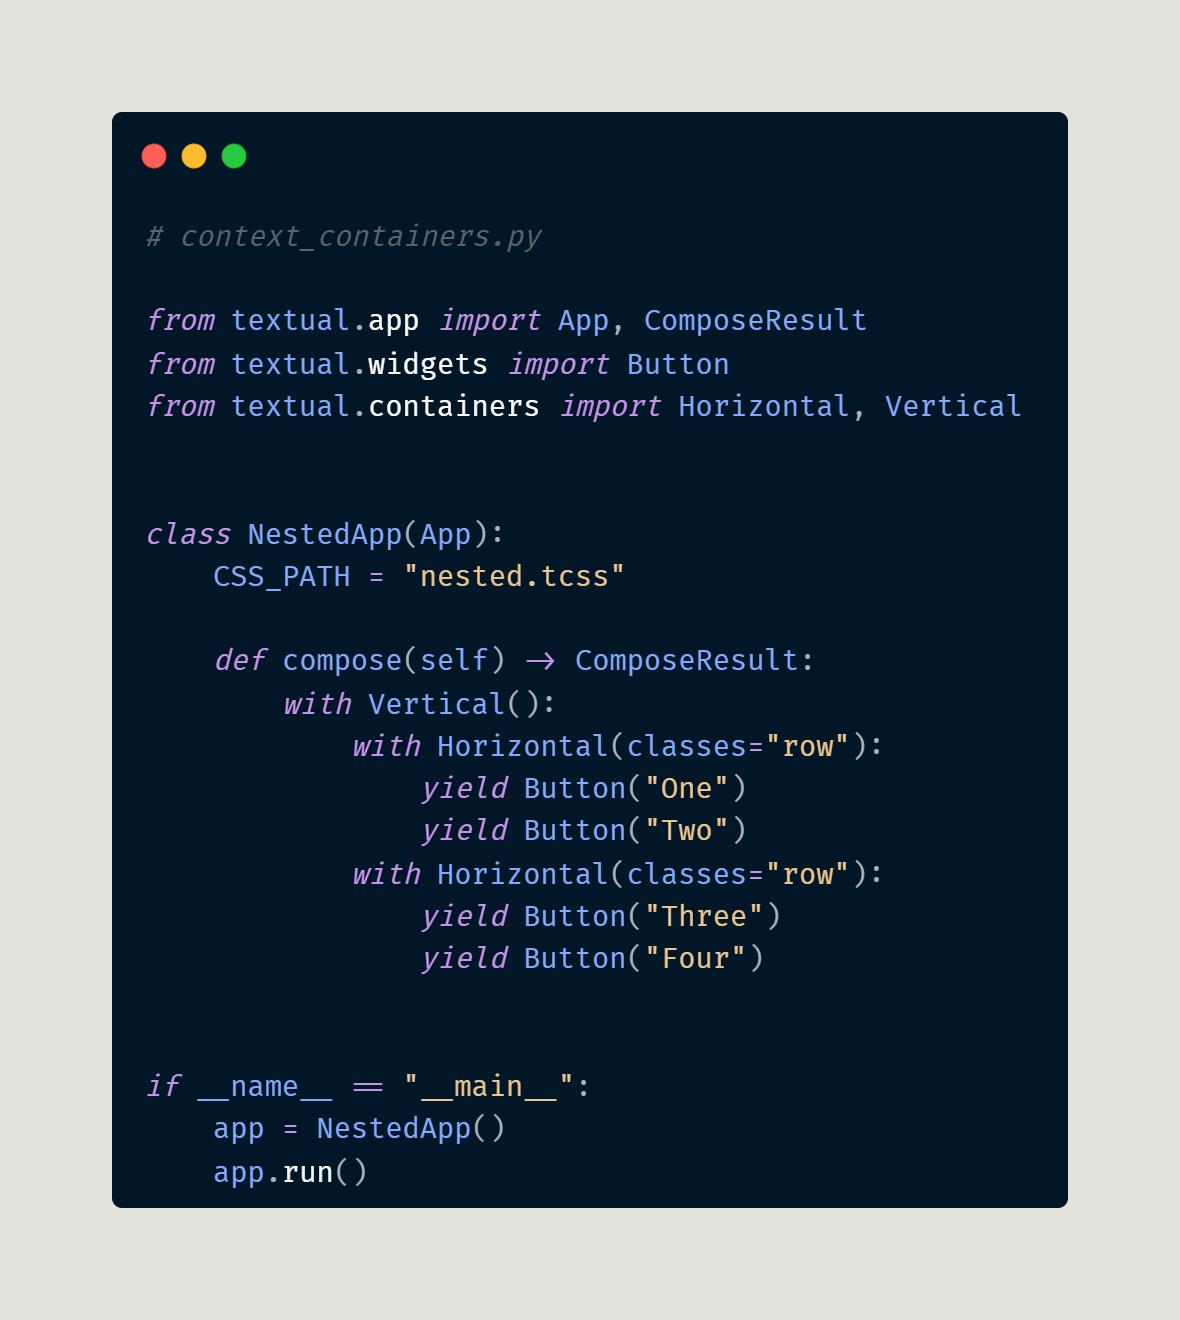
When you use Python’s with statement, you are telling Python to manage the creation and destruction of the widget. You’ll notice that in this code version, you must re-add the yield statements for the Button widgets since they are no longer passed to the containers as parameters.
This code is equivalent to the previous code. There isn’t a recommended way or the other. Feel free to use either variation in your code.
Wrapping Up
You learned some basics on using Textual containers to arrange your widgets in your Python TUI. Next week, you will continue to learn even more about laying out your TUIs with Textual and keep growing your TUI skills.
See you then!