

Widget layout is an important subject. By default, Textual arranges your widgets starting at the top of the screen and appending them in a vertical stack. Most graphical user interface toolkits follow a similar pattern; sometimes, they simply stack the widgets on top of each other.
Each GUI or TUI toolkit provides a way to lay out your widgets. In this tutorial, you will learn how to use Textual to arrange your widgets onscreen.
Specifically, you will learn the following:
Vertical layout
Horizontal layout
Let’s get started!
Vertical Layout
The default orientation in Textual is to arrange widgets vertically. You don’t even need to use a CSS file to apply this orientation.
But what does a vertical layout mean anyway? A vertical layout means you add widgets to your application from top to bottom. Here is an illustration of what that might look like:
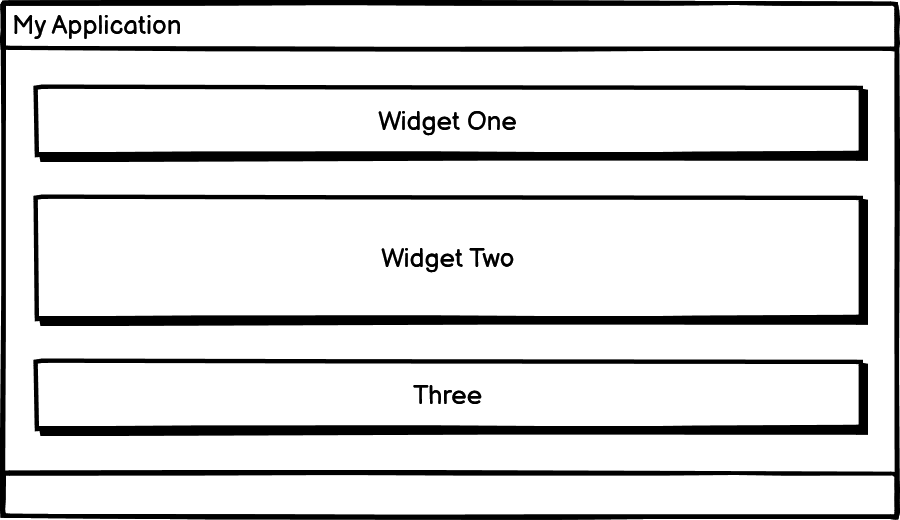
When you add widgets to a Textual application, it lays them out similarly to the image above. If you want to see that for yourself, then open up your Python editor and create a new file named vertical.py.
Then enter the following code into your new script:
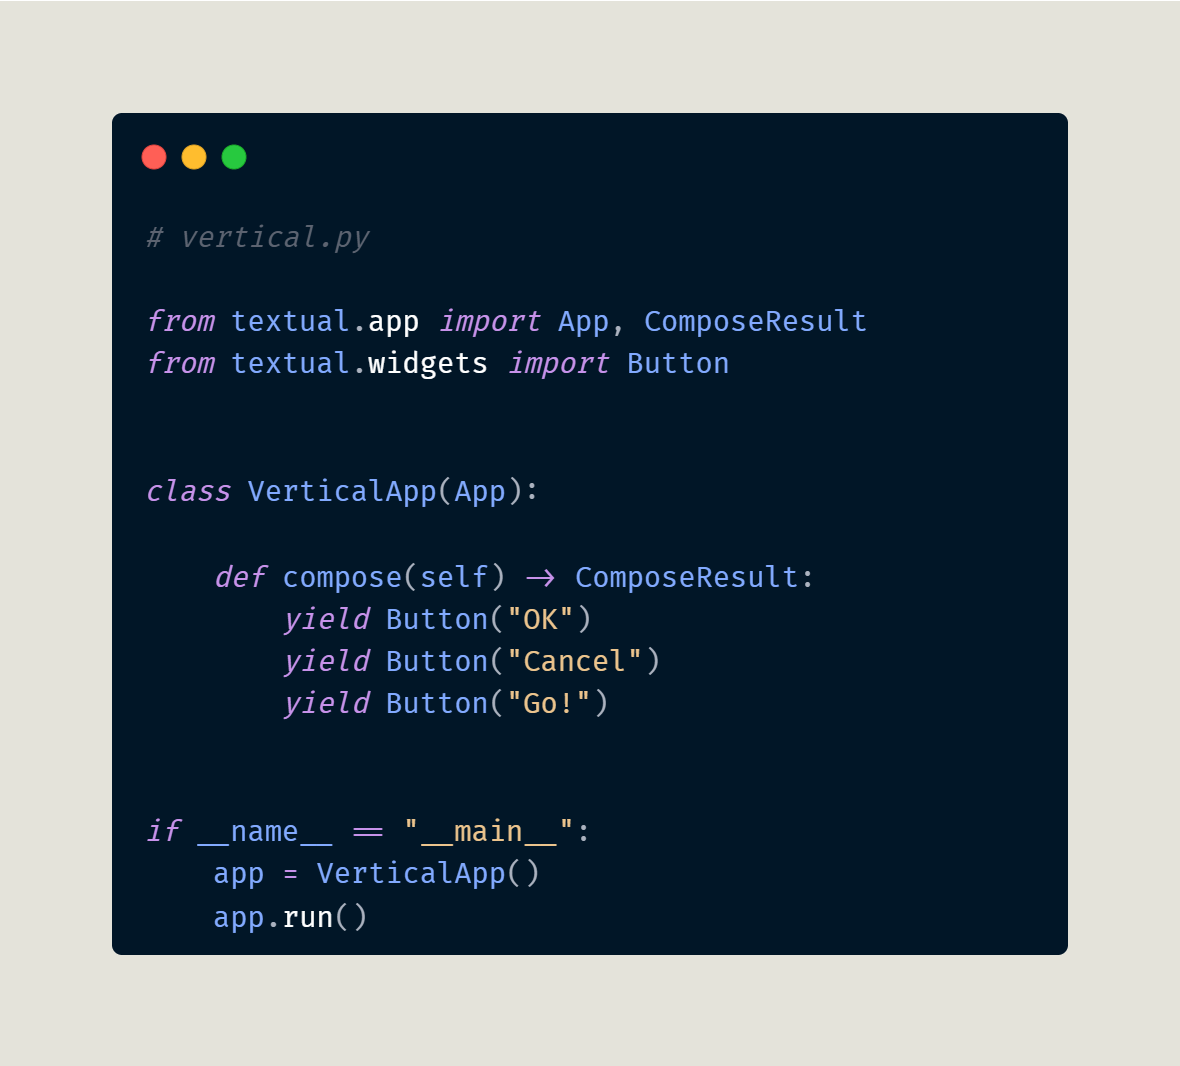
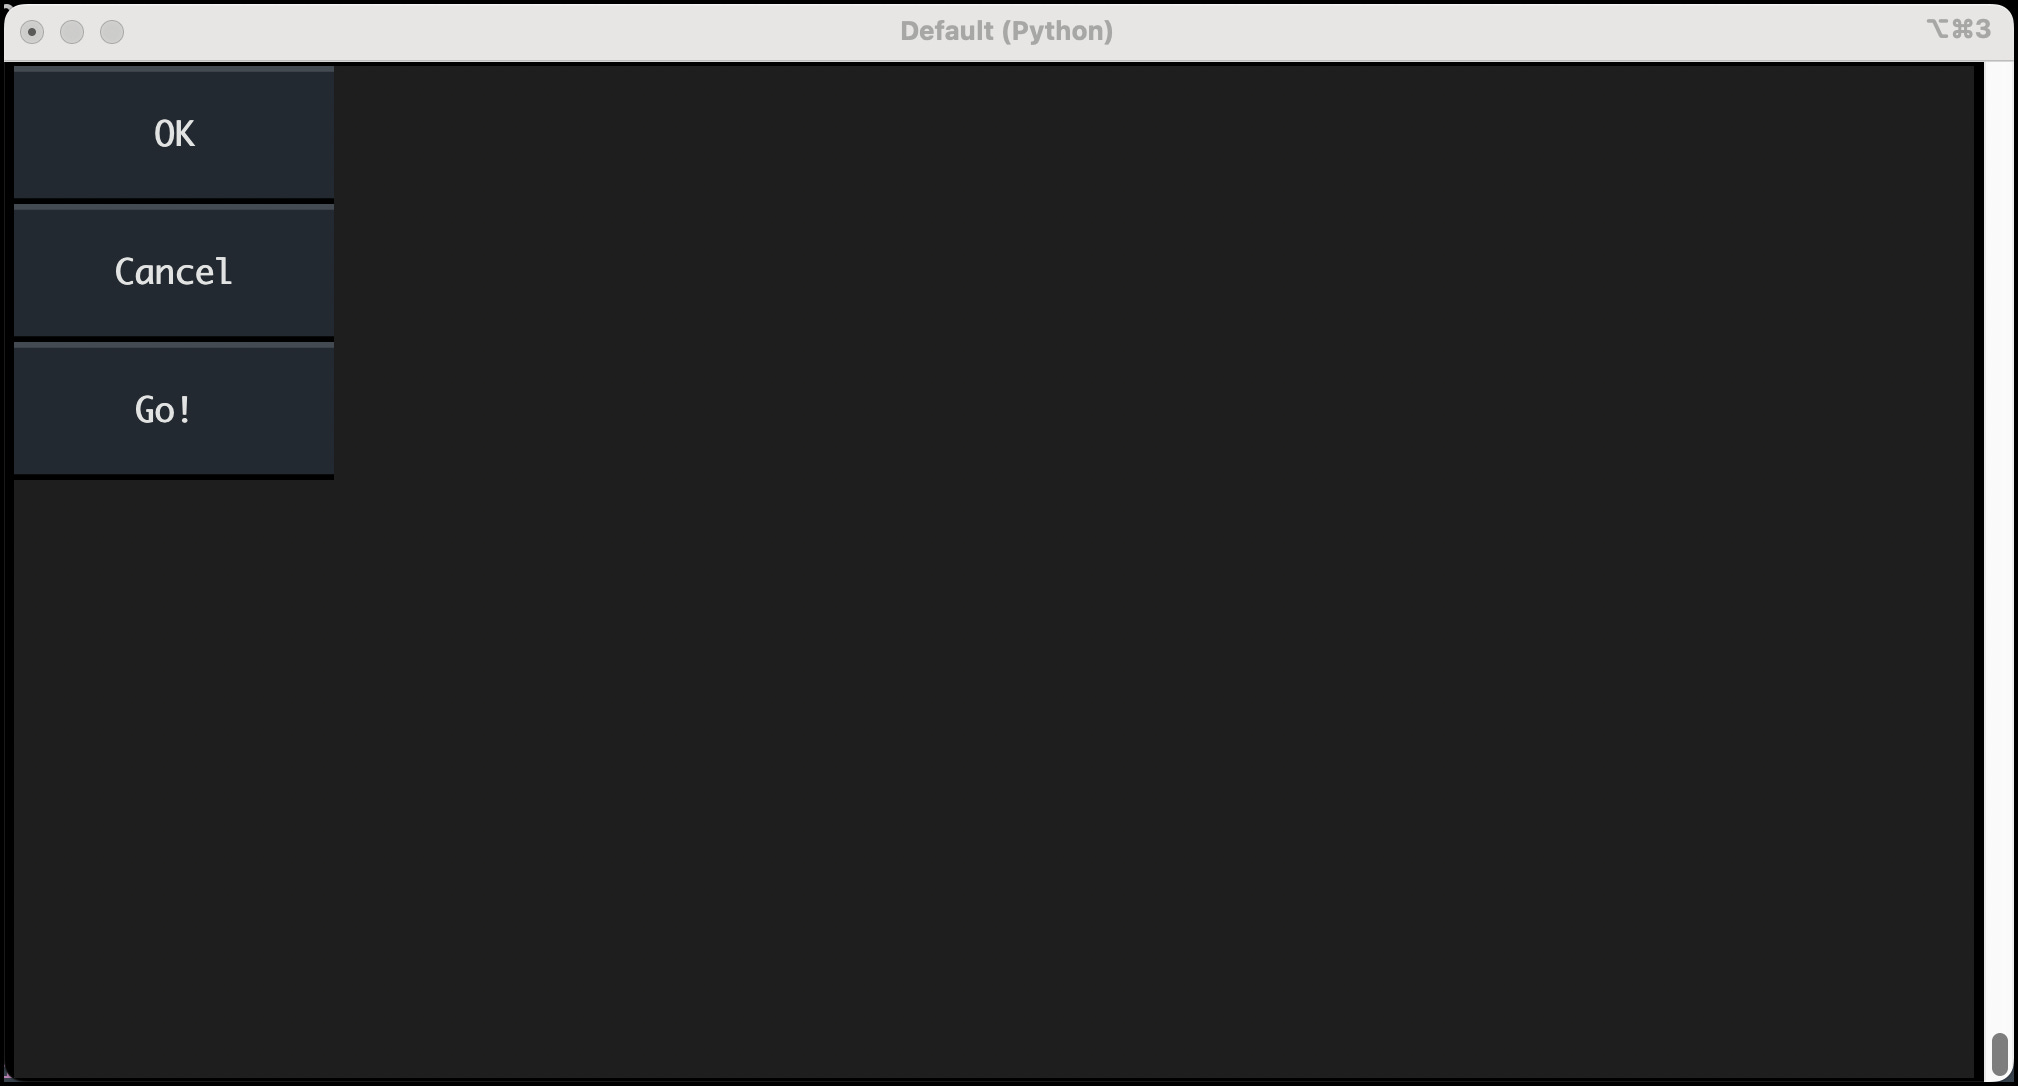
Now open up a terminal and run your code. When you do, you will see three buttons on screen, with the top one being your “OK” button and the bottom one being the “Go!” button.
Here is a screenshot of the application to give you an idea of what it looks like:
You can change the widget size, color, and more using each widget's styles attribute, but using CSS is simpler. Let's update the code above to use a vertical.tcss file:
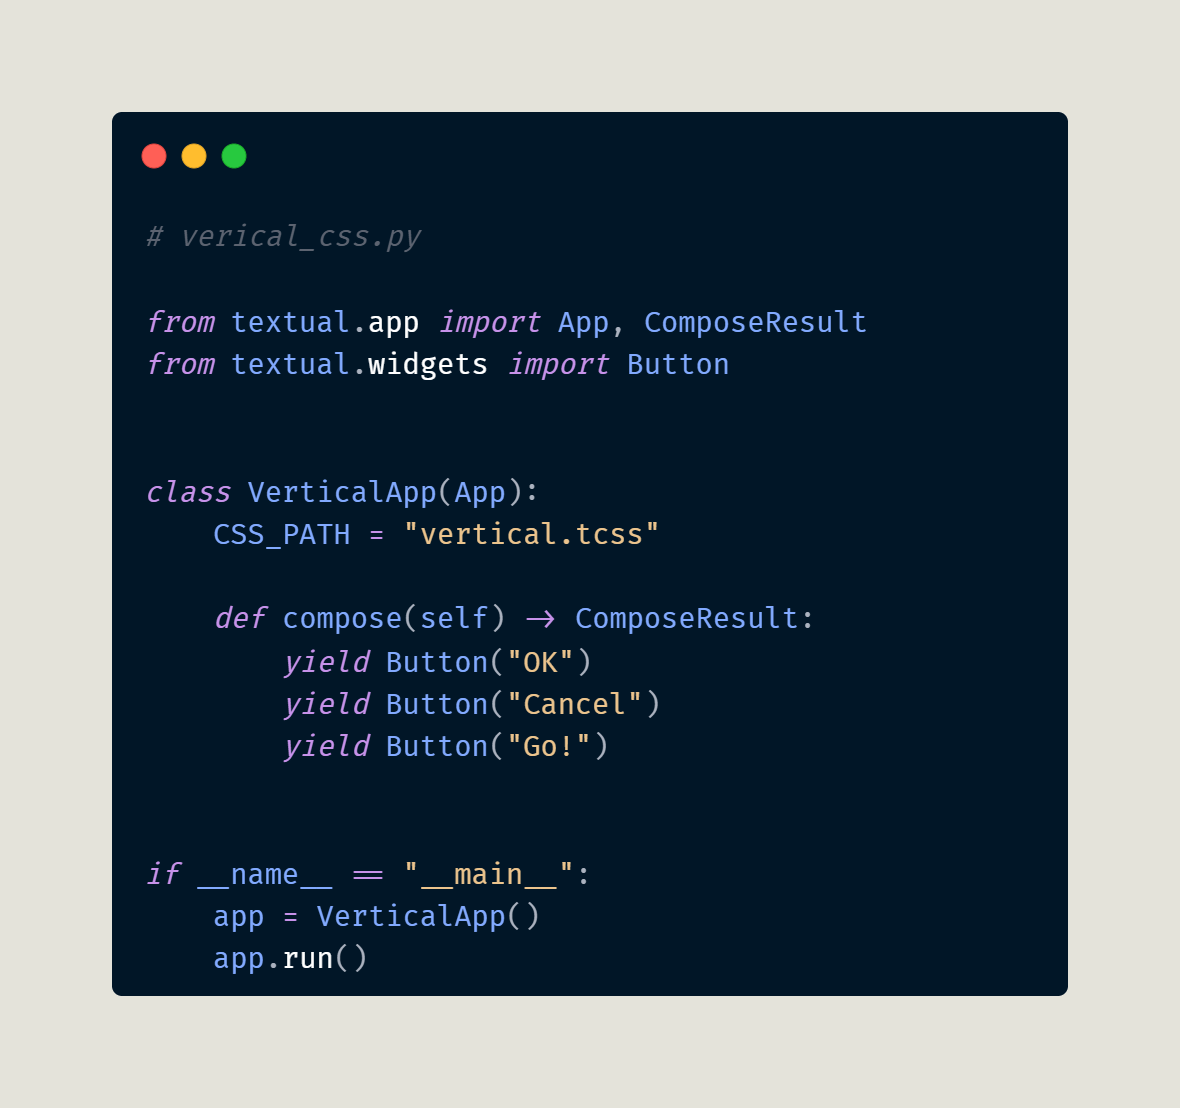
Now that you are referring to a CSS file, you should go ahead and write one. If you don’t, you will get an error when you try to run the code saying the CSS file could not be found.
Go ahead and open your favorite text editor or use your Python editor to create a file named vertical.tcss. Then enter the following code:
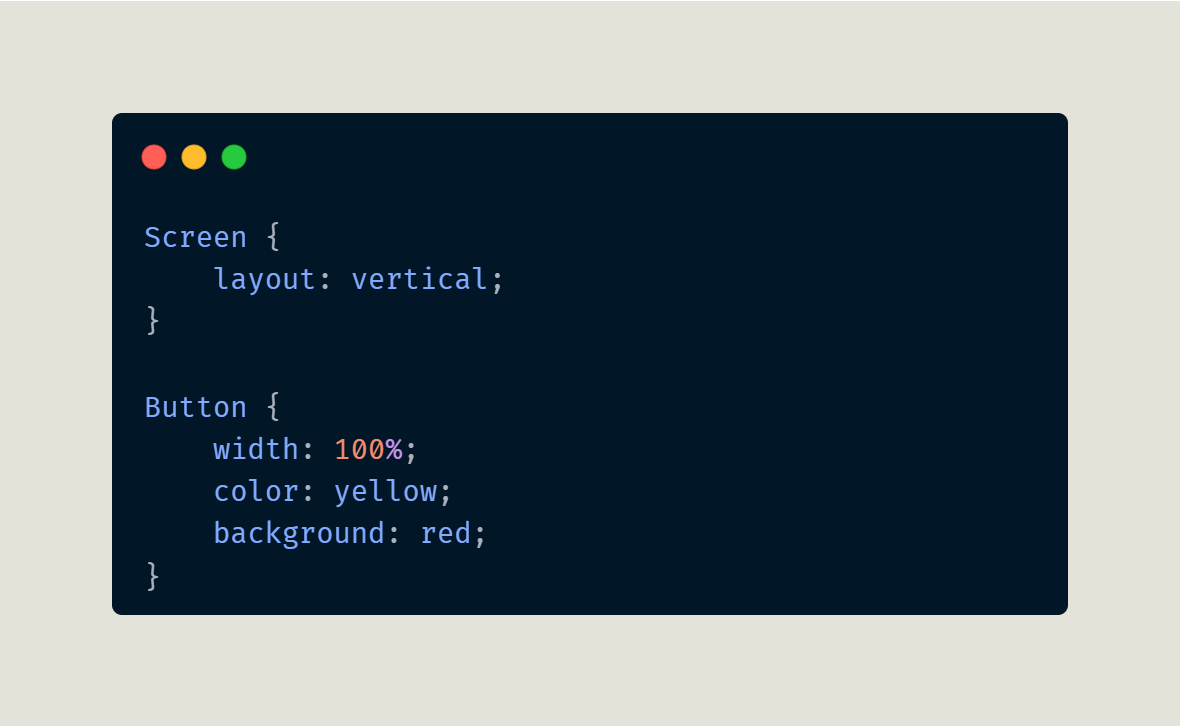
You do not need the Screen portion of the CSS since that is technically taken care of automatically by Textual. Remember, Screen is the default widget when you launch an application. However, it is always good to be explicit so you understand what is happening. If you want the output to look exactly like the previous example, you can delete this CSS’s Button portion and try running the code that way.
To prevent the Button styling from affecting buttons in other screens, you can nest it inside of the Screen CSS like this:
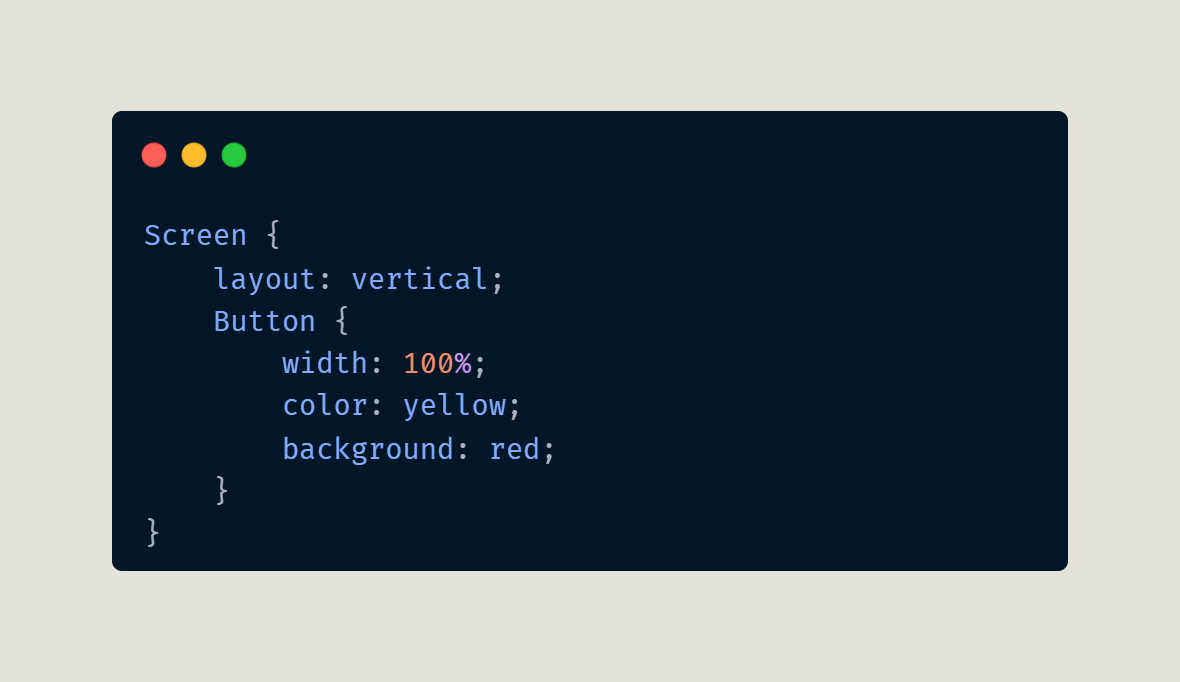
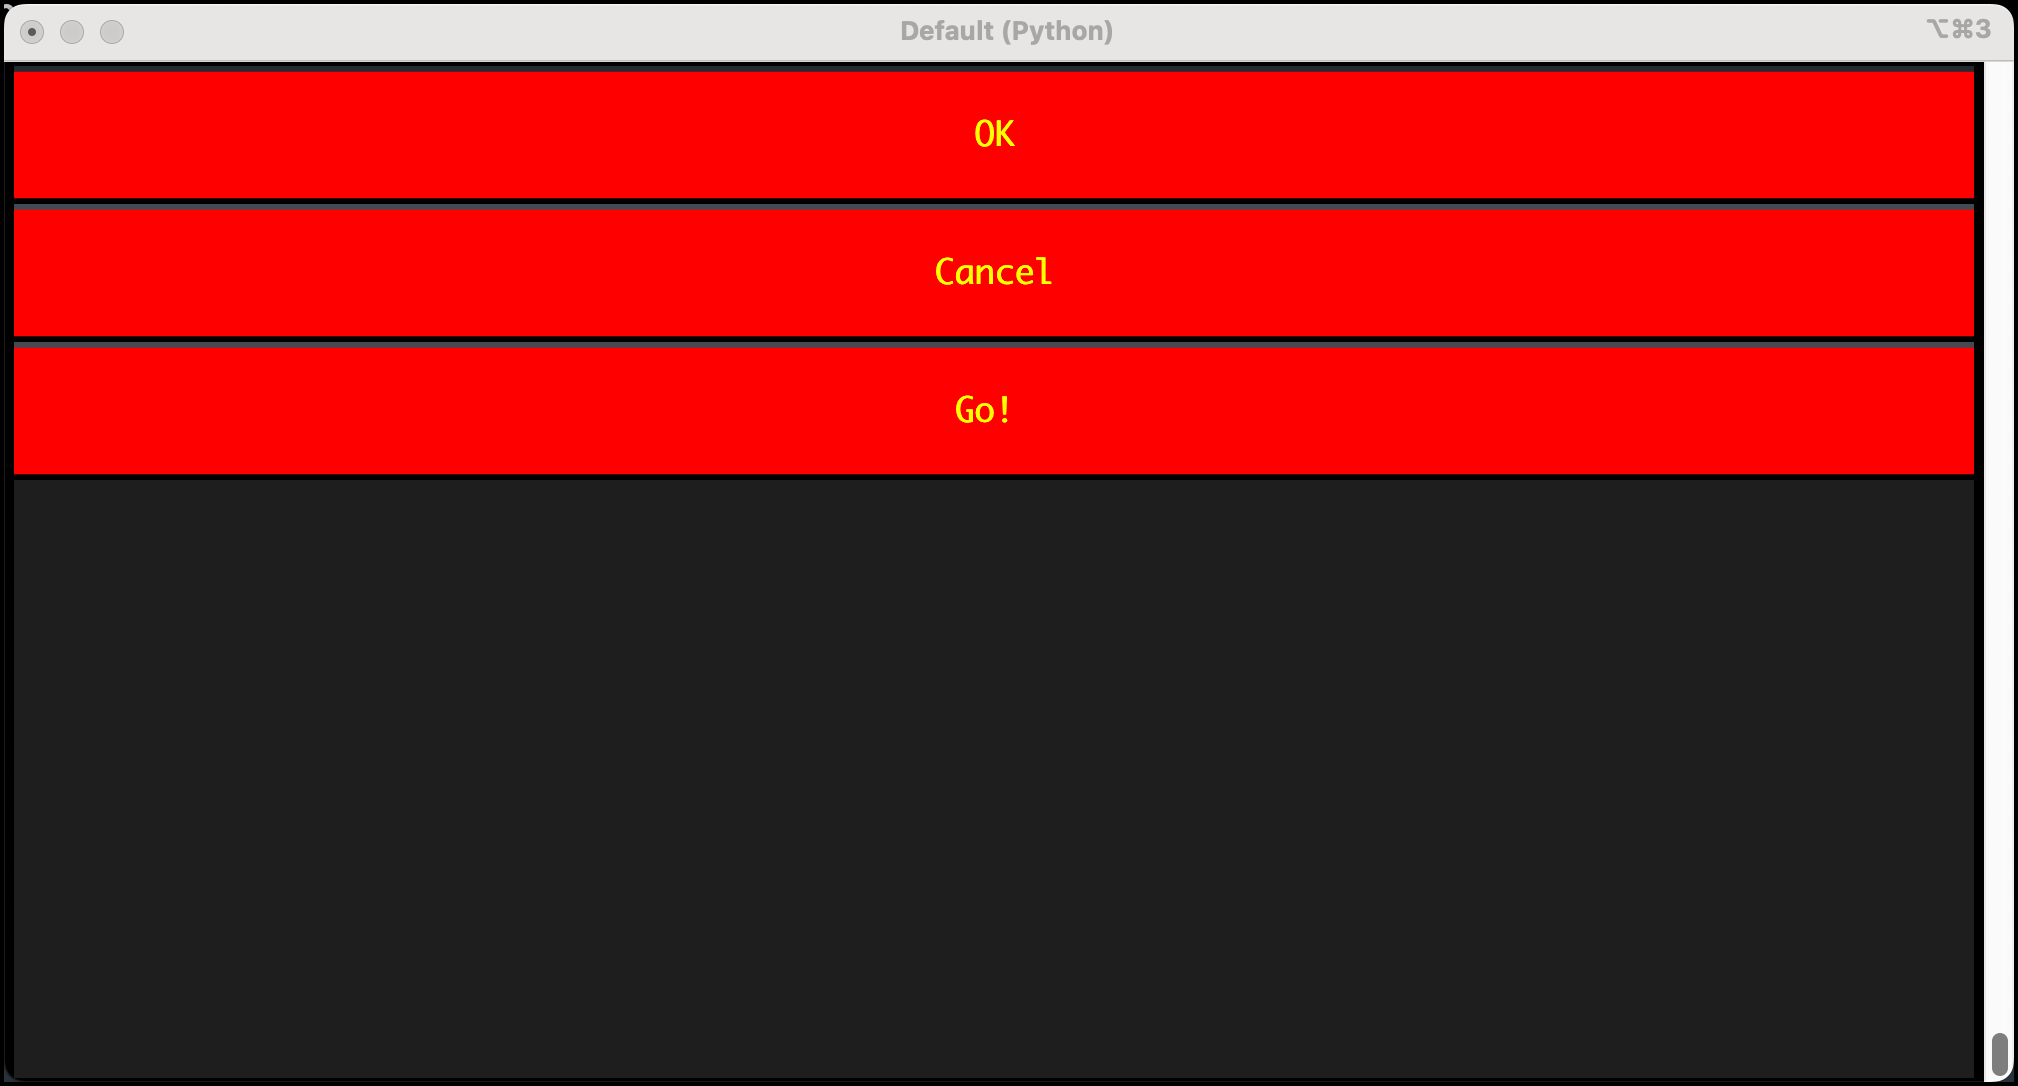
If you decide to include the Button portion of the CSS, you will make all of the Button widgets 100% wide, which means they will all stretch across the entire width of the screen. The CSS also defines the button text to be yellow and the buttons themselves to have a red background color.
When you run this code, you will see something like the following:
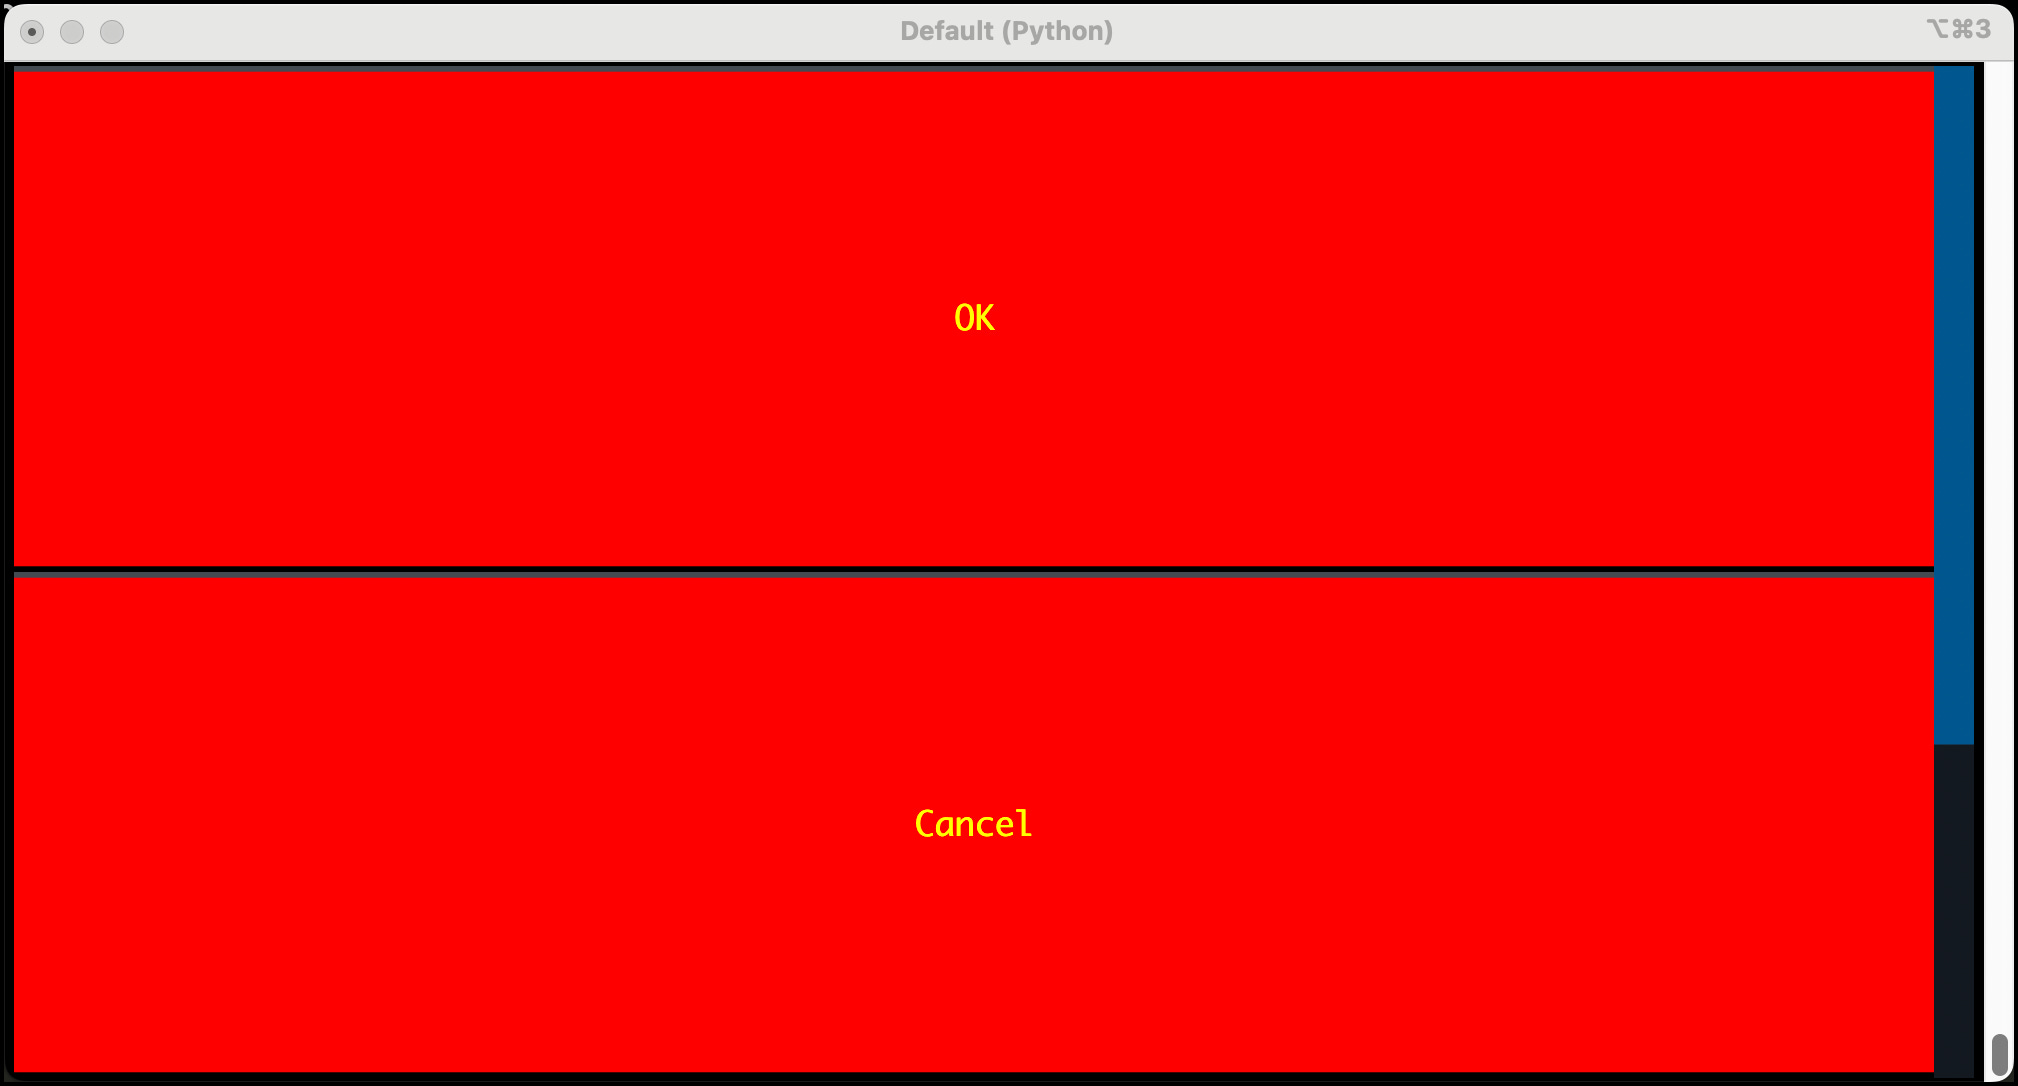
That’s a fun way to change your vertically oriented widget layout. But what happens if you set the height of the Button widgets to 50%? Well, you have three widgets. Three times 50% is 150%, which is more than can be shown at once. Textual will add a scrollbar if you add widgets that go off-screen.
Try adding that setting to your CSS and re-run the code. You should see something like the following:
Spend a few moments trying various width and height sizes. Remember, you don’t have to use percentages. You can also use other unit types. If you need a refresher, refer back to chapter 2.
Note: All style attributes can be adjusted at runtime, which means that you can modify the layout at runtime, too. Use this wisely so as not to confuse the user!
When you finish experimenting, you will be ready to learn how horizontal layouts work!
Horizontal Layout
Laying widgets out horizontally, left to right, requires a little more work than laying them out vertically. But the change is still pretty minor and, in many ways, affects only one line in the CSS file.
But before you change the CSS, you will want to update your Python code to point to the new CSS file. Open your Python editor and copy the previous example to a new file. Save it with the same horizontal.py and update the CSS_PATH to point to a new CSS file named horizontal.tcss:
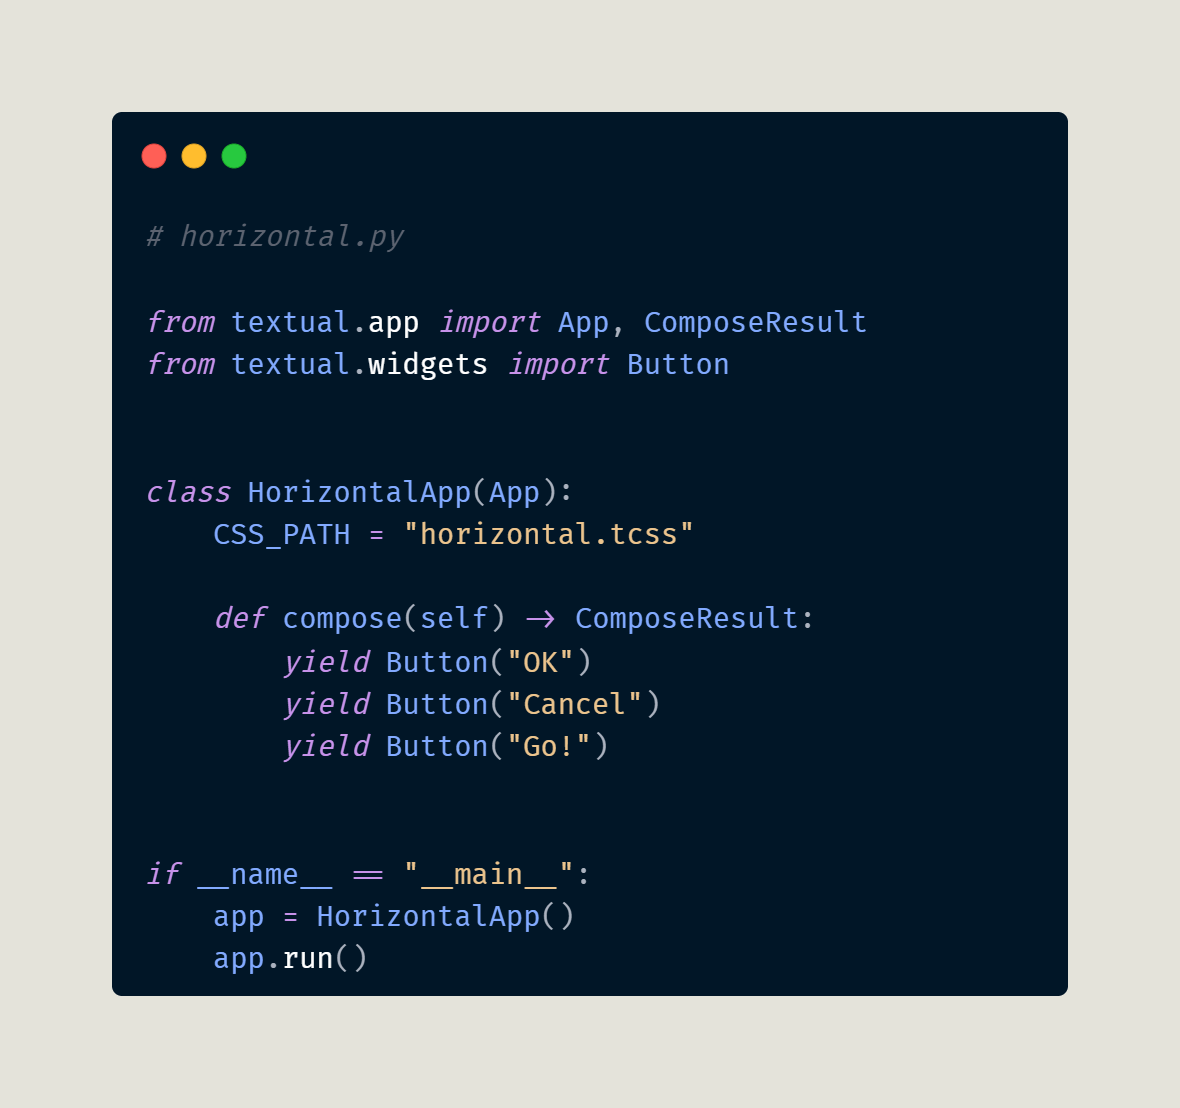
Yes, this code is almost the same as the previous example, except the CSS_PATH variable. That’s okay. The point is to show you how you can change the layout.
Create your horizontal.tcss file in a Python or text editor to make a horizontally oriented layout. Then enter the following CSS:
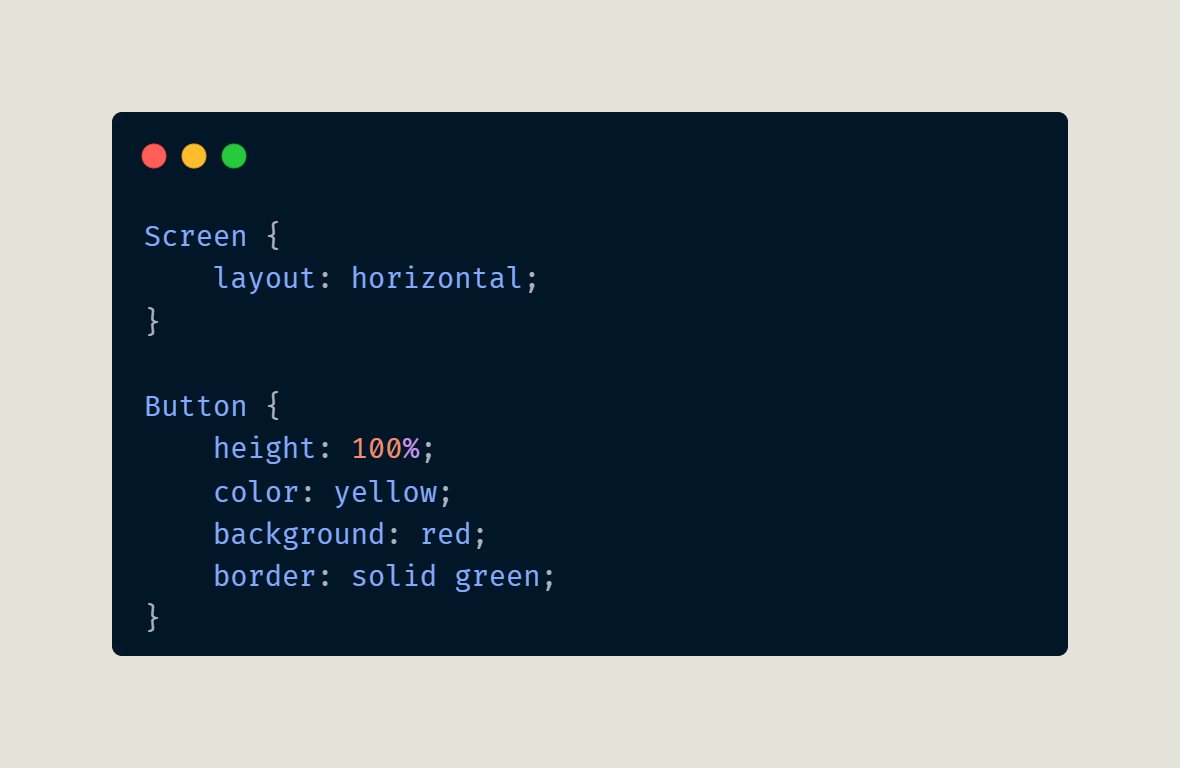
The CSS above added a border to the buttons to make them stand out a bit more. Depending on the terminal, the widgets appear to blend together more when arranged horizontally. You can add space around the widgets by setting the margin style, though.
When you run this code, you should see something like the following:
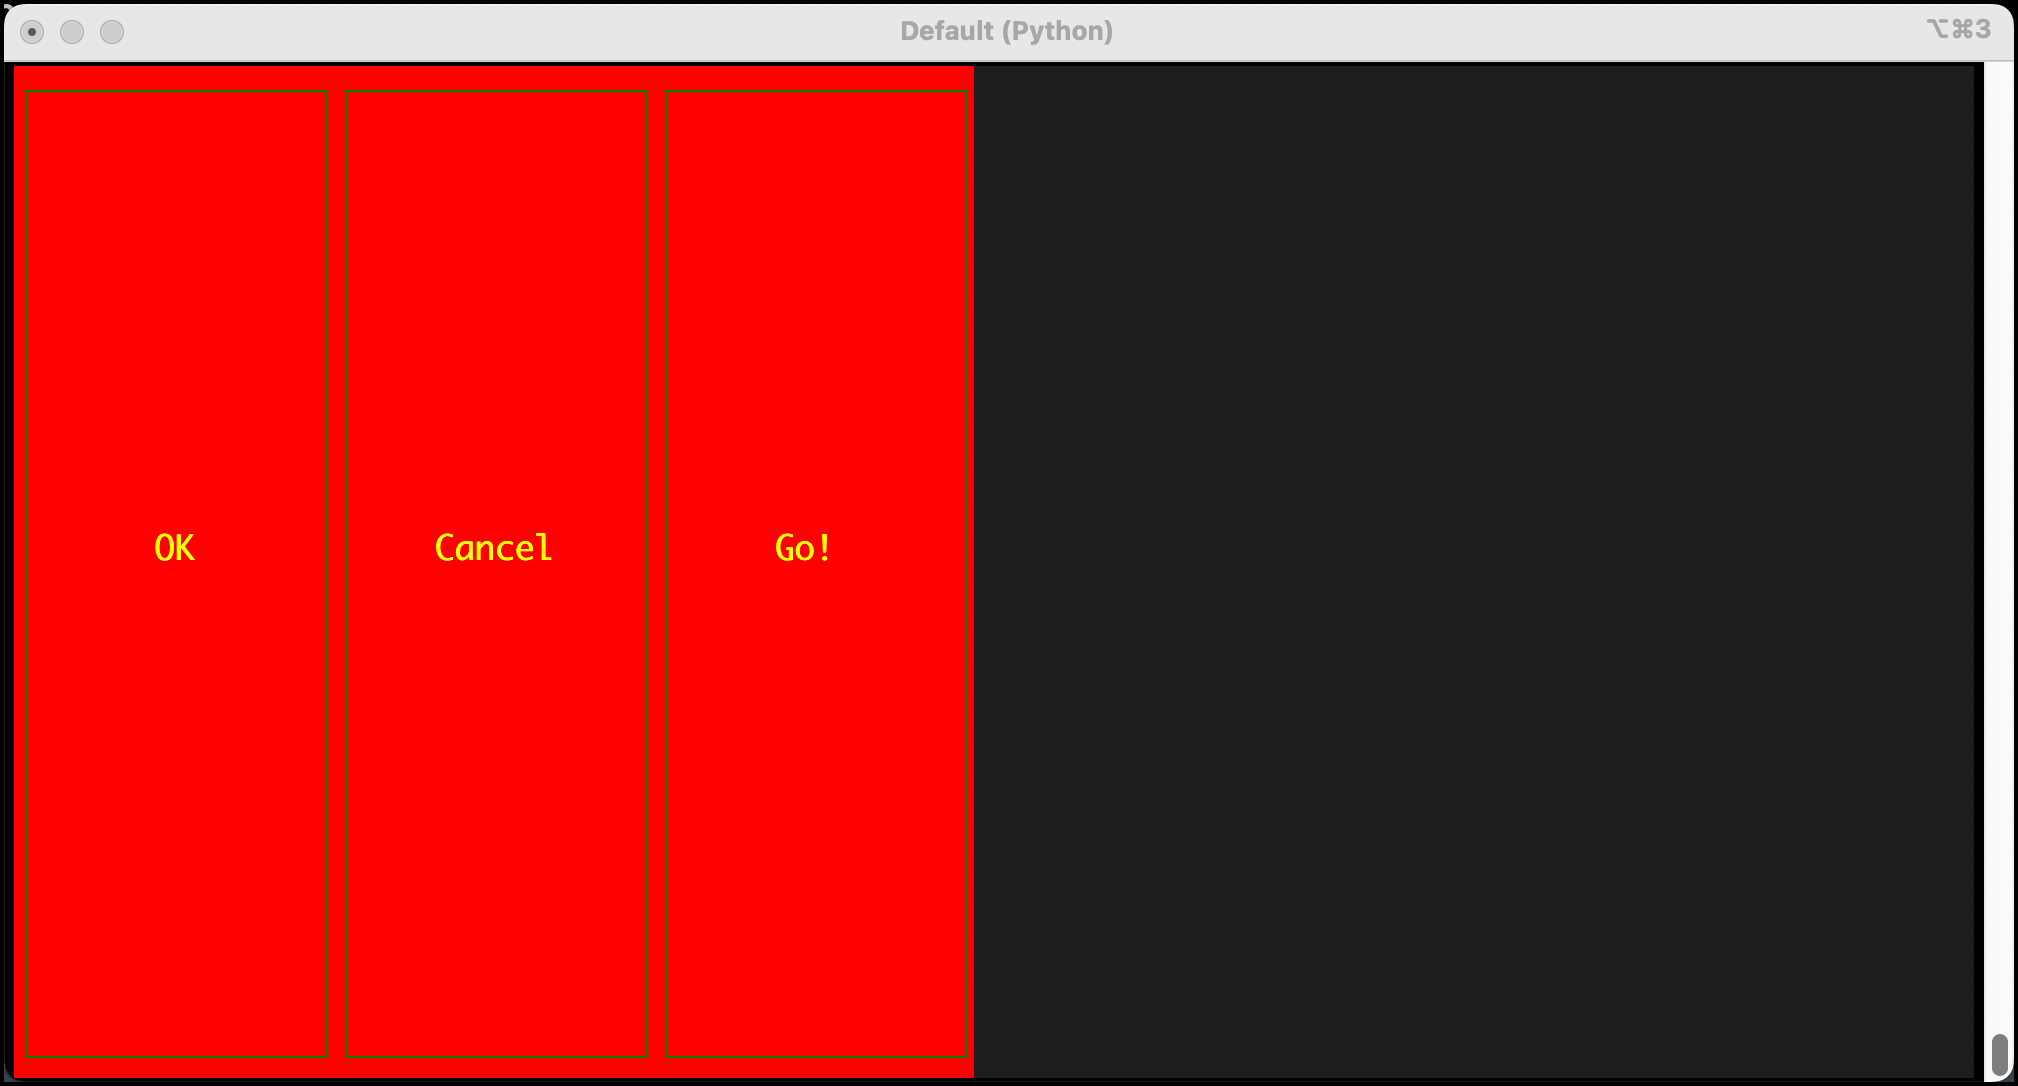
Now, set the widgets' width to more than 33% so the scrollbar appears. Spend some time experimenting, and you'll figure it out soon!
Wrapping Up
Learning how to lay out your widgets in Textual is one of your first steps toward designing a nice TUI application. Keep practicing, and you will soon find you can create pretty much any layout you can imagine!
Want to Learn More Textual?
This tutorial is based on a chapter from my latest book, Creating TUI Applications with Textual and Python.